
Appendix BMulti-message sign combinations (informative)#
Difference
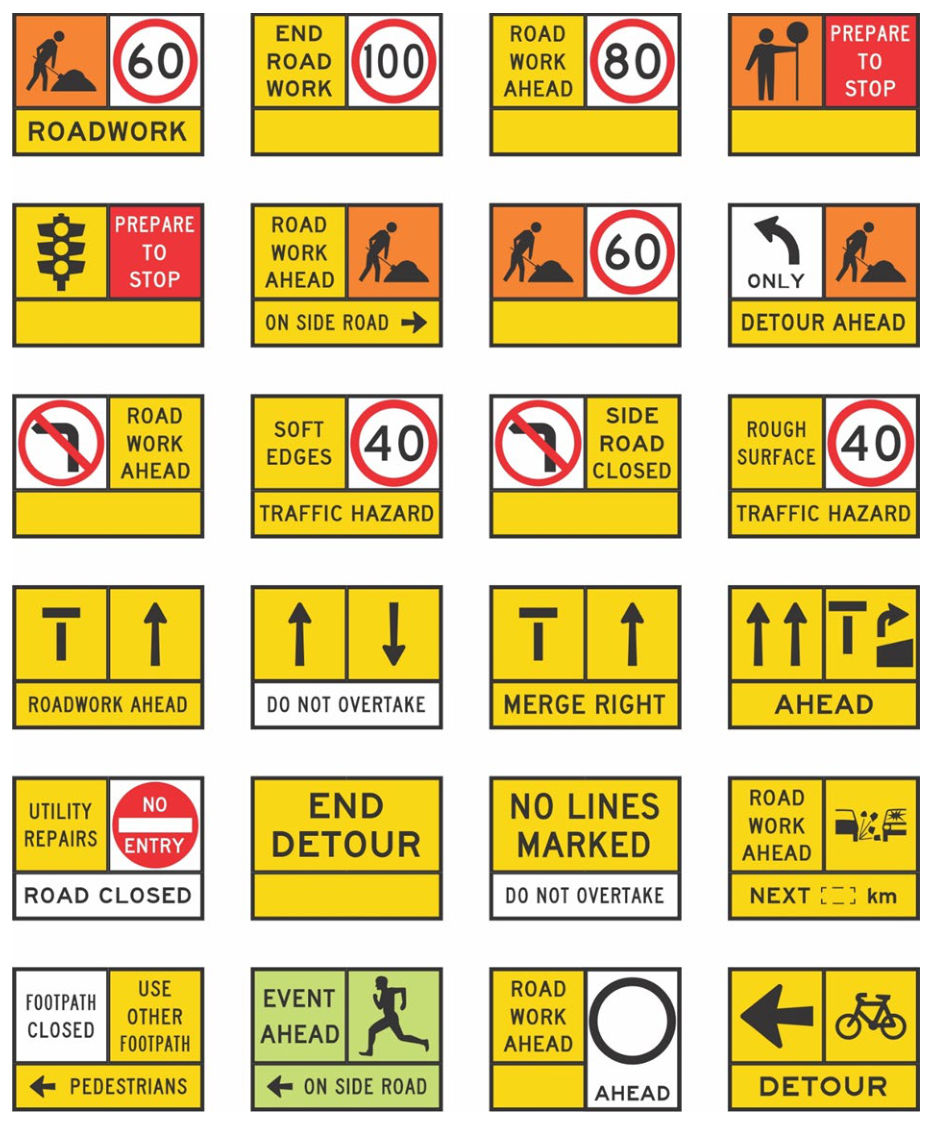
The following replaces Figure B1 - Multi-message sign combination examples.
Addition
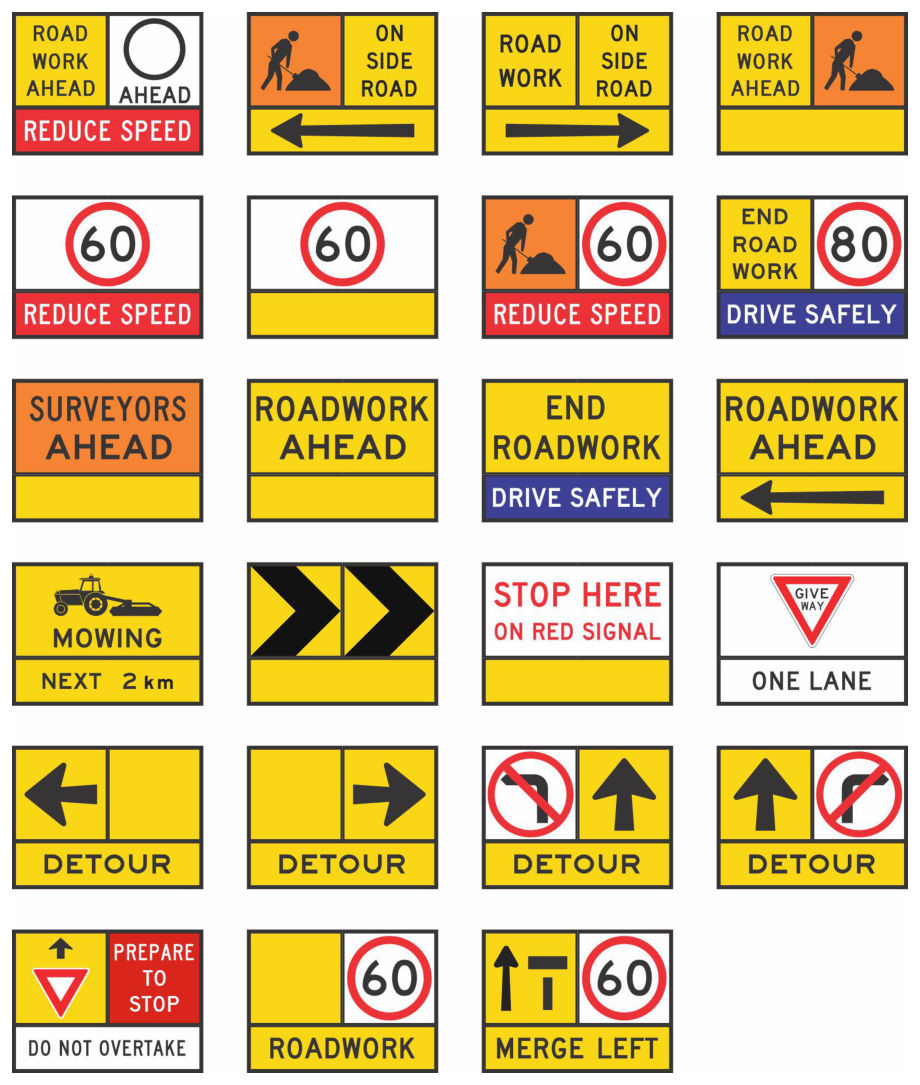
The following Figure B2 provides additional multi-message sign combination examples.
The following replaces Figure B1 - Multi-message sign combination examples.
The following Figure B2 provides additional multi-message sign combination examples.