6Example toll point sign layouts#

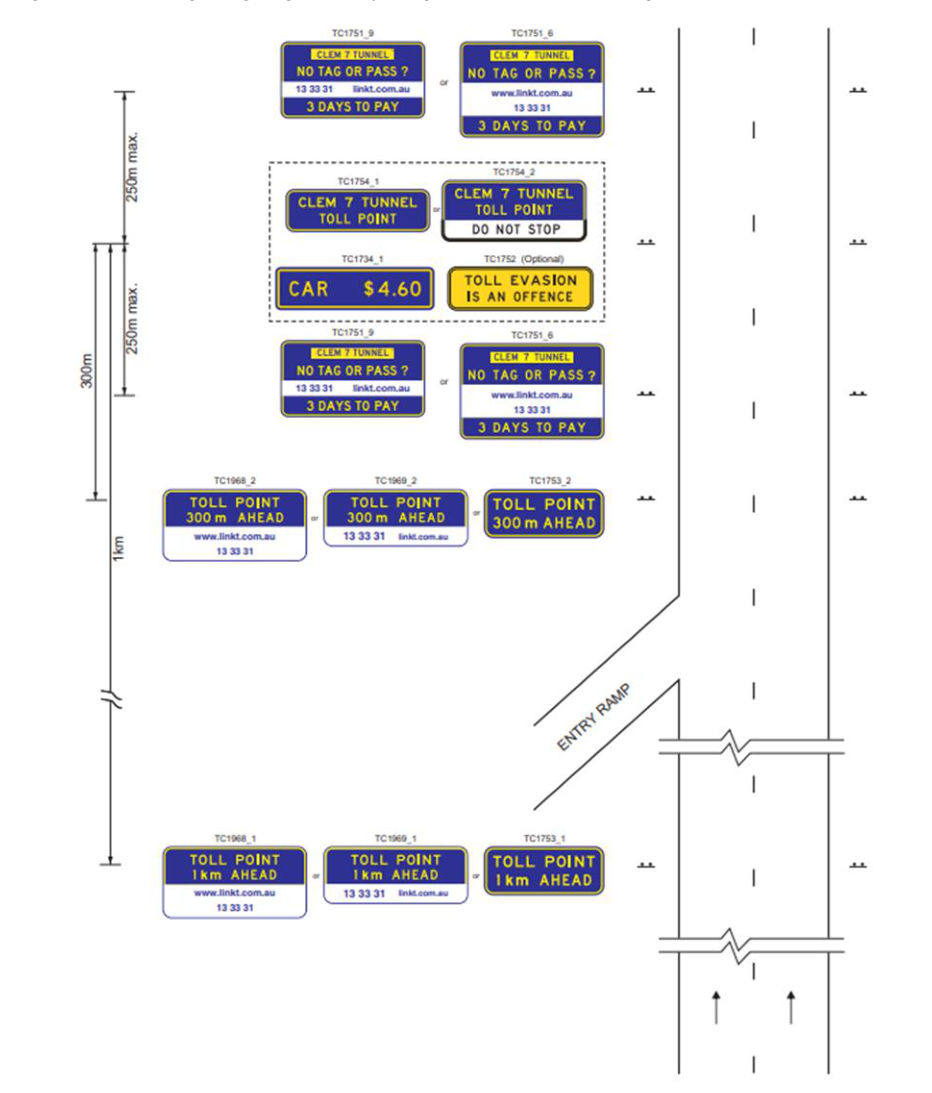
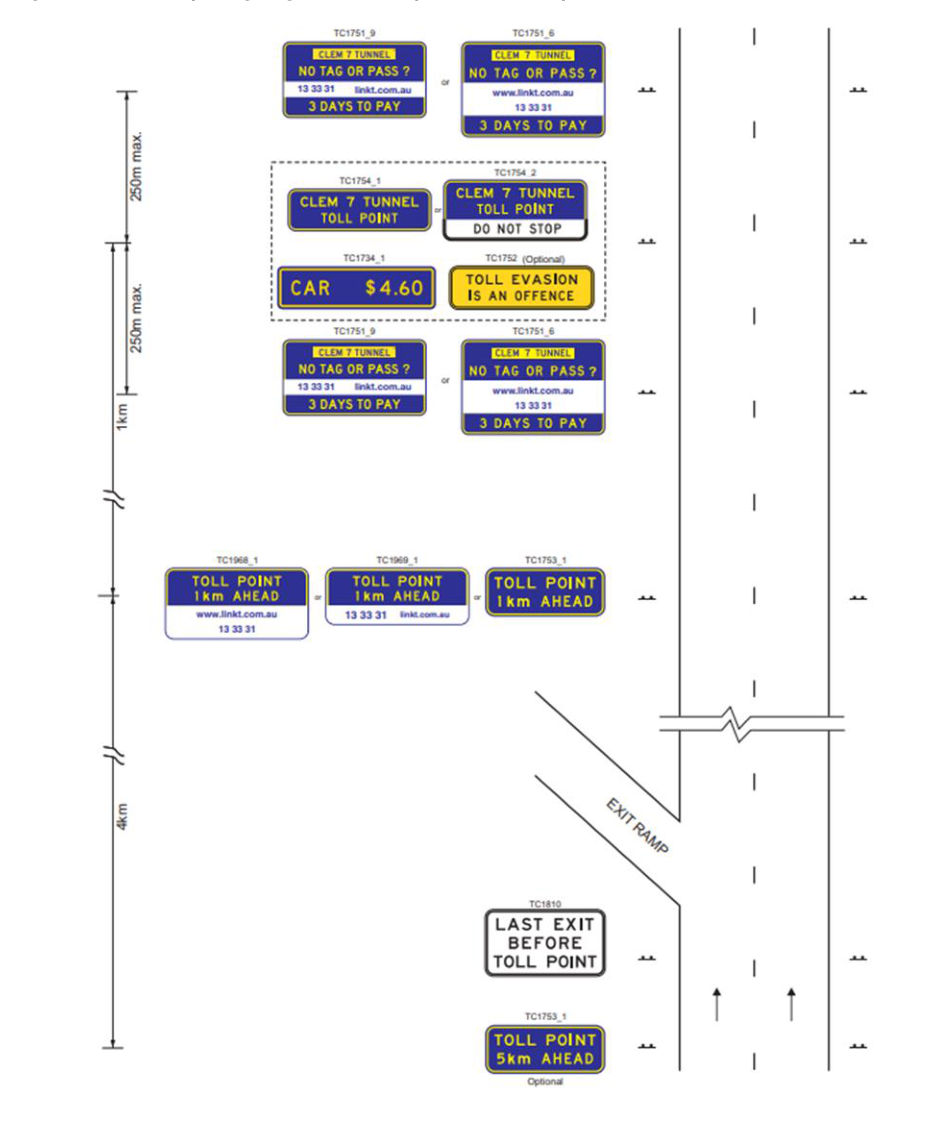
Example layouts are shown in figures 6(a) and 6(b) as follows.

Figure 6(a) – Example signing for entry ramp within 1km of the toll point – tunnel (TC1971_1)
Figure 6(a) – Example signing for entry ramp within 1km of the toll point – tunnel (TC1971_1)p. 14
Figure 6(b) – Example signing for last exit prior to the toll point – tunnel (TC1971_2)
Figure 6(b) – Example signing for last exit prior to the toll point – tunnel (TC1971_2)p. 15

Drawings from the original pages

Source: TRUM Vol 3 Part 10 · pages 13–15 Open PDF at this page Search this document